How to Clean a Front-Load Washer Gasket and Remove Mold
You just washed your favorite towels, but they still smell oddly musty.
The detergent may not be the problem: moisture, lint, and residue can collect inside the rubber gasket of a front-load washer.
Before the next load, inspect the folds, remove debris, and use only the cleaning method approved for your exact model.
This guide explains how to clean a front-load washer gasket safely.
Start with the washer empty and unplugged, clean every fold with a nonabrasive cloth, and follow the manufacturer-approved treatment—not a viral one-size-fits-all formula.
Rinse, dry thoroughly, and leave the door ajar only when the manual permits and the opening is safe.
Your Mold-Busting Arsenal: What You’ll Need
- Microfiber cloths or soft white rags
- Warm water
- Soft nylon brush or old toothbrush, if the manual permits
- Gloves
- The model-approved appliance cleaner or correctly diluted bleach solution
- Flashlight and a shallow towel for the floor
Cleaning the gasket and removing the moisture source matter more than escalating to stronger chemicals.
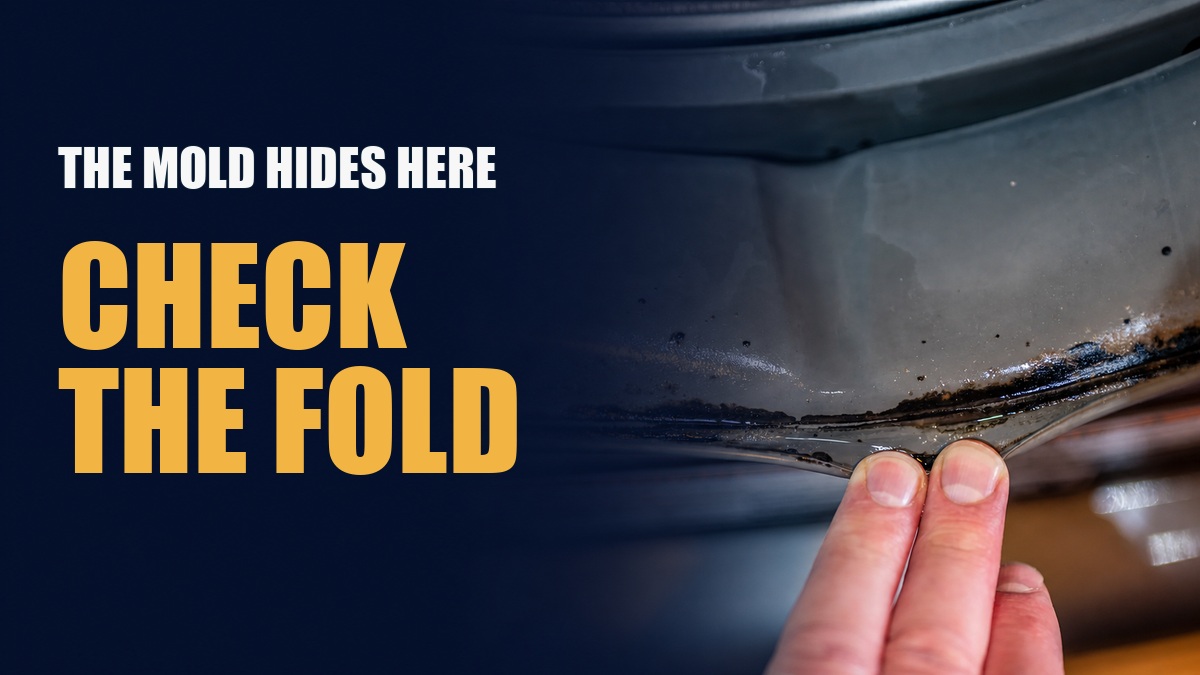
The Brave Inspection: What’s Hiding in the Gasket Folds?
Start with the washer off, empty, and unplugged. Open the door and gently pull the gasket toward you without stretching it.
Use a flashlight to inspect the outer lip, inner folds, bottom channel, drain holes, and the area where the gasket meets the drum.
Remove coins, hairpins, lint, pet hair, and small clothing items by hand.
Do not use a knife, screwdriver, or metal pick. A punctured door boot can leak during the next wash and usually requires replacement.
Look for more than discoloration.
A tear, loose retaining band, standing water that never drains, or repeated leakage points to a mechanical or drainage issue. Cleaning will not repair it.
How to Clean a Front-Load Washer Gasket: the Safe Routine
- Remove loose debris. Work from the top down and clear the lower channel last.
- Wipe routine soil. Use warm water and a soft cloth, or the mild appliance cleaner named in the manual.
- Clean every fold. Rotate the drum by hand only if the manual permits, and inspect the full circumference.
- Treat visible mildew correctly. Follow the exact manufacturer’s dilution, dwell time, gloves, ventilation, and rinsing instructions.
- Rinse away cleaner. Use a clean damp cloth so residue does not contact the next laundry load.
- Dry the seal. Wipe the surface, folds, door glass, and lower channel with a dry cloth.
- Run the approved maintenance cycle. Clean the empty tub according to the manual after the gasket work.
Should you use bleach on a washer gasket?
Use bleach only when the manufacturer permits it and follow that brand’s exact dilution.
Whirlpool currently describes a tough-stain method using 3/4 cup of liquid chlorine bleach in one gallon of warm water, a five-minute contact time, gloves, gentle scrubbing, rinsing, and drying.
That is Whirlpool guidance—not a universal recipe for every rubber seal.
LG support material varies by model and region, with some current guidance pointing to oxygen-based bleach for routine gasket care.
This difference is why copying a viral cleaning ratio can be risky. Find the model number, download the manual, and use the method written for that washer.
Do not scrape the rubber seal or combine cleaners. If mold is widespread outside the gasket or moisture comes from a wall, drain, or hidden leak, treat it as a building-moisture problem.
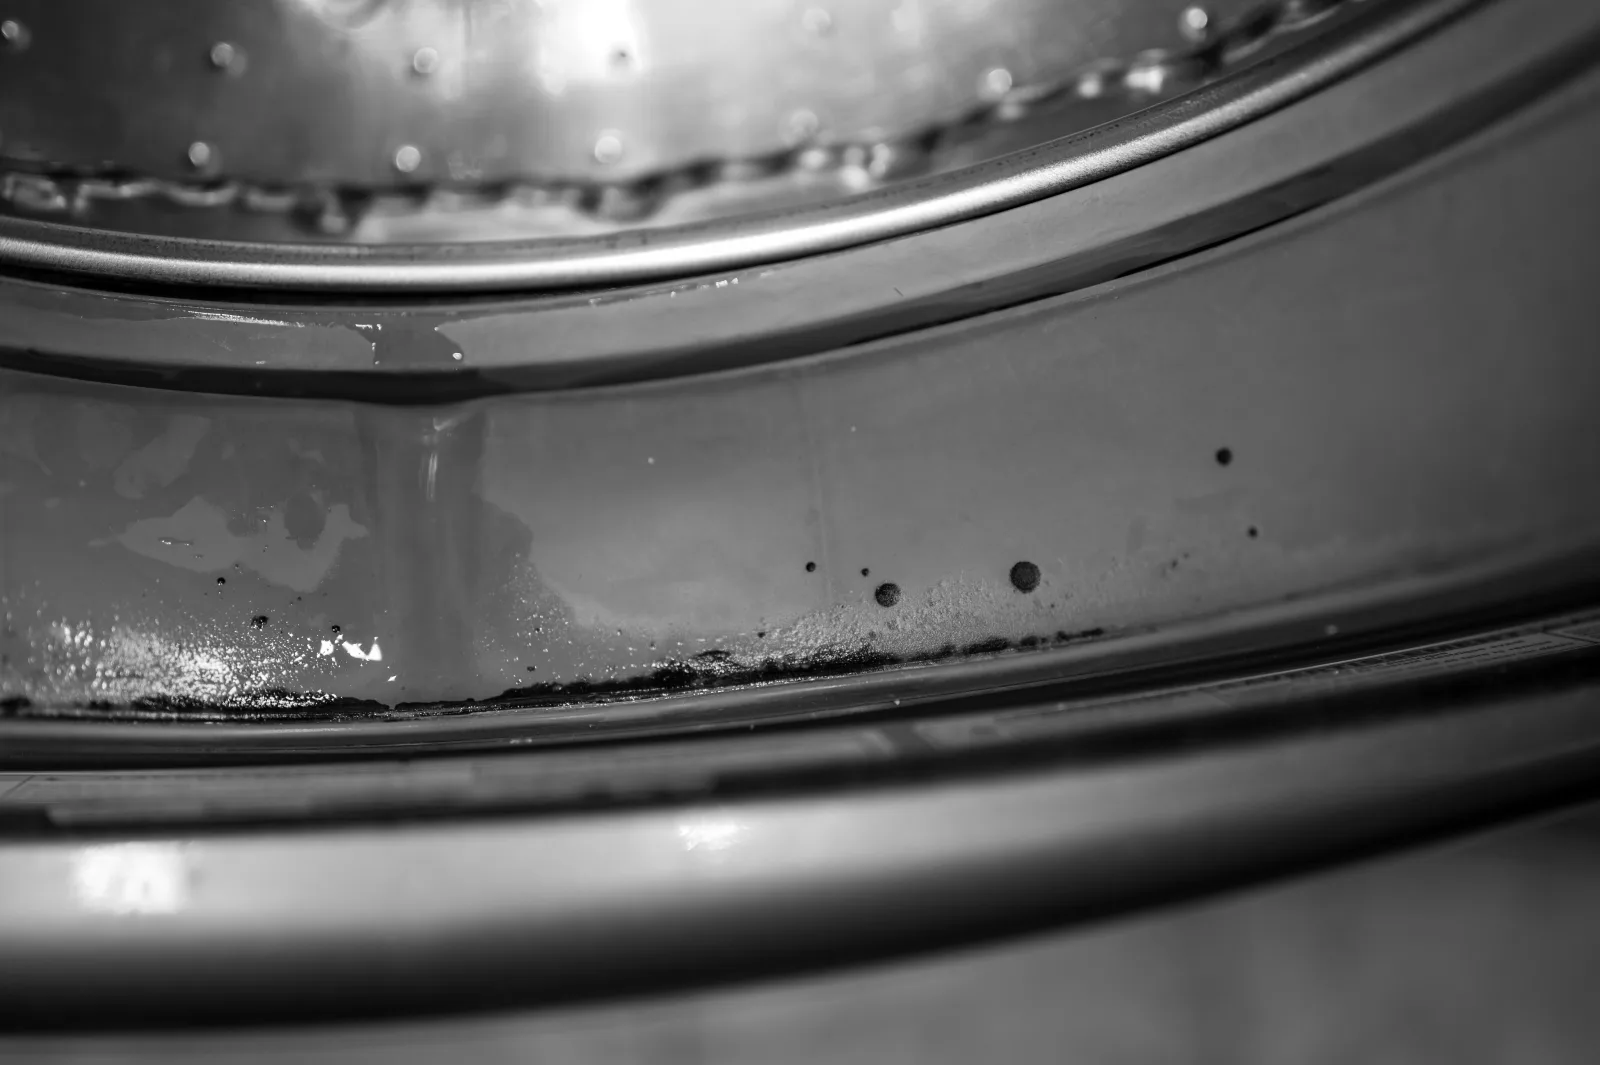
The Ugly Truth About Black Gasket Stains
A seal can be clean yet remain permanently stained.
If the surface is smooth, intact, odor-free, and no residue transfers to a white cloth after the approved cleaning routine, discoloration alone does not prove active growth remains.
Here’s the relief: a smooth, intact, odor-free gasket that leaves no residue on a white cloth can be clean even when a dark stain remains.
Replacement becomes the better answer when the gasket is cracked, slimy after repeated correct cleaning, leaking, permanently odorous, or deeply colonized in inaccessible areas.
Door-boot replacement involves a tension spring or retaining band and must be done correctly to prevent leaks. Use a qualified technician if the service procedure is beyond your experience.
If a large area of mold is present in the laundry room itself, anyone has respiratory symptoms, or moisture is coming from a wall, drain, or hidden leak,
treat it as a building-moisture problem rather than an appliance-cleaning project.
Keep Mold From Returning: the Dry-After-Laundry Routine
- Remove wet laundry promptly.
- Wipe the gasket and door glass after the final load.
- Remove hair and lint from the lower fold.
- Leave the washer door and detergent drawer ajar when the manual permits and the opening is safe from children and pets.
- Use the correct amount of HE detergent; more detergent can mean more residue.
- Run Tub Clean or Self Clean at the manufacturer’s interval, commonly monthly.
- Clean the dispenser and drain-pump filter as directed.
- Investigate standing water, slow drainage, and recurring leaks promptly.

Common gasket-cleaning mistakes
| Mistake | Why it fails | Better move |
|---|---|---|
| Cleaning only the visible lip | Water and debris collect in hidden folds | Inspect the entire circumference |
| Using an abrasive pad | Scratches create more places for residue to hold | Use a soft cloth or approved nylon brush |
| Mixing vinegar and bleach | Can release dangerous chlorine gas | Use one approved cleaner only |
| Skipping the drain holes | Standing water returns after every cycle | Clear them gently according to the manual |
| Closing the door immediately | Traps moisture in the warm seal | Dry and ventilate when safe |
| Ignoring detergent overdose | Residue feeds recurring odor | Measure HE detergent correctly |
Frequently asked questions
What is the best way to clean a front-load washer gasket?
Remove debris, clean every fold with warm water and a nonabrasive cloth, apply only the model-approved mildew treatment, rinse, dry, and run the manufacturer’s empty maintenance cycle.
Can I use vinegar on a rubber washer seal?
Do not assume vinegar is safe for every seal. Some manufacturers discourage it because repeated acid exposure may affect rubber components. Follow the exact washer manual.
How often should I clean the washer gasket?
Remove debris and standing water after laundry and perform a careful inspection during the monthly washer-cleaning routine. Clean sooner when residue or odor appears.
When should a washer gasket be replaced?
Consider replacement when it is torn, leaking, permanently odorous, slimy after correct cleaning, or deeply contaminated in areas that cannot be reached safely.
The door seal is only one maintenance point. See how often to clean the whole washing machine, including the tub, dispenser, and drain-pump filter.
Manufacturer guidance
Guidance checked in August 2026. Always use the instructions for the exact washer model and cleaner label.