Rubber Plant Propagation: Stem Cuttings, Nodes and Rooting Steps
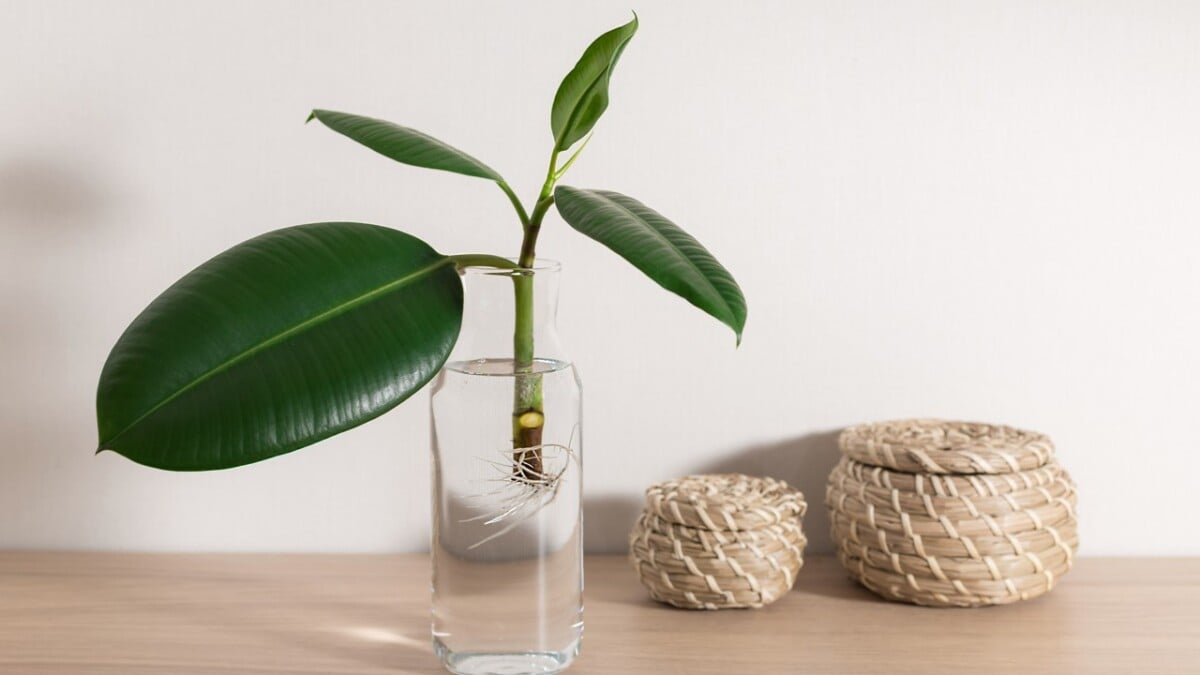
Rubber plants (Ficus elastica) are popular houseplants with glossy leaves, and propagation can turn a healthy pruning into another plant. The crucial detail is the cutting: include a piece of stem with a node and a growing bud. A detached leaf may make roots without developing the shoot needed for a new rubber plant.
Can You Propagate a Rubber Plant from One Leaf?
A plain leaf and petiole are not a dependable way to produce a complete rubber plant. A leaf-bud cutting is different: it includes a short piece of stem, a node and its axillary bud along with the leaf. That bud can produce the new shoot.
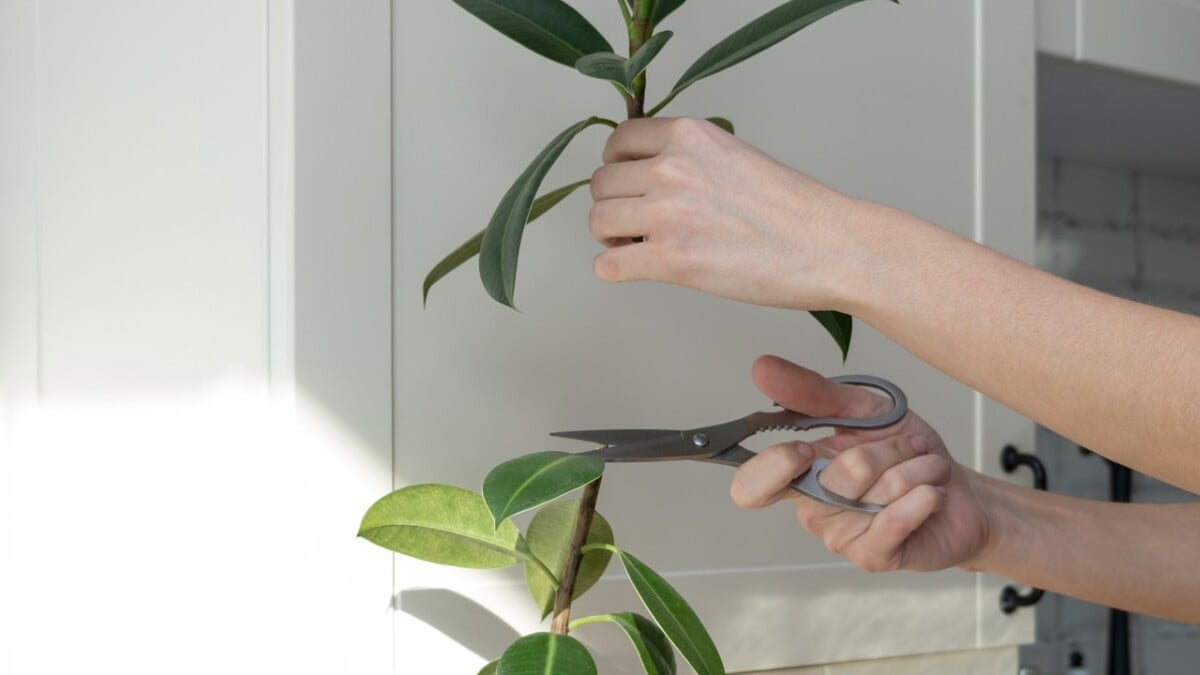
For a first attempt, choose a healthy stem tip with a few leaves and at least one suitable node. A node is the point where a leaf joins the stem; look for the small bud near that junction. Make the basal cut just below a node so the node remains on the cutting. Do not confuse the middle of a smooth internode with a node.
Prepare the Plant, Tools and Cutting
If you are taking the cutting while reshaping a tall plant, plan the parent plant’s cut first with our rubber plant pruning guide. Keep enough healthy foliage on the parent and select suitable material from the piece you remove.
- Work during active growth, usually spring or summer indoors. Use a healthy parent plant rather than one already suffering from rot or severe stress.
- Prepare clean, sharp shears, a clean rooting container and fresh rooting medium if using soil.
- Wear gloves and protect the work surface. Rubber plant latex sap can irritate skin and eyes; keep cuttings away from children and pets.
- Take a stem section with a viable node and bud. Remove lower leaves that would sit in water or be buried in medium, while retaining some foliage above.
- Let dripping sap stop, then choose water or a moist, aerated rooting medium. If using rooting hormone, follow its label rather than assuming more is better.
Method 1: Rooting a Stem Cutting in Water
Place the basal node in clean water while keeping the leaves above the waterline. Use a stable container that supports the cutting without crushing the stem. Keep it in warm, bright, indirect light rather than direct afternoon sun.
Refresh the water regularly and whenever it becomes cloudy. Watch the stem as well as the roots: a firm stem is promising, while a soft, darkening base or foul smell suggests decay. Water propagation makes progress easy to see, but it does not guarantee success or remove the need for a growing bud.
When the cutting has several established roots with some branching, move it into a small draining pot of fresh, aerated mix. Do not transplant at the first tiny root tip or wait until a large tangled root mass fills the glass. Handle the new roots gently.
Method 2: Rooting Directly in a Medium
Use a clean, airy rooting medium such as a suitable perlite-based propagation mix. Pre-moisten it, make a planting hole and insert the basal node with the remaining leaves above the surface. Firm the medium gently so the cutting stays upright.
Keep the medium lightly moist and aerated, not saturated. A loose clear cover can reduce moisture loss if leaves wilt, but it must stay off the foliage. Ventilate it and remove it if excessive condensation or decay develops. A sealed wet container is not a substitute for careful moisture control.
Keep the cutting warm in bright, indirect light. Do not tug it out repeatedly to look for roots. New growth and gentle resistance can be clues, but new leaves alone are not proof of a well-established root system. Give roots time to develop before moving the cutting into a larger pot.
Water or Soil: Which Should You Choose?
- Water: useful when you want to observe root development. It needs clean water and a careful transition to potting mix.
- Medium: roots develop in the material they will grow in, but they are harder to inspect. Moisture must remain balanced while the cutting has limited roots.
- Either method: start with a viable bud and node. Healthy tissue, warmth and suitable light matter more than choosing a fashionable container.
After Potting: Support the Transition
Use a pot only a little larger than the new roots. Water to settle the mix, let it drain and watch moisture more closely during establishment. Keep the plant in the same gentle light initially; avoid direct sun, heavy fertilizer or another repot while it is adjusting.
Rooting often takes several weeks, and slower conditions can extend the wait. There is no dependable deadline that fits every cutting. A firm cutting that has not rooted yet deserves patience; a mushy one needs attention rather than a larger dose of water.
Troubleshooting and Air Layering
- Roots but no shoot: confirm that you included a growing bud. A leaf-only cutting can remain a rooted leaf.
- Soft or black base: discard clearly decayed tissue. Restart with clean tools and a healthy cutting if no viable section remains.
- Drooping leaves: review water uptake, heat and humidity. Reduce exposure and keep the medium appropriate; do not automatically flood it.
- A tall, woody parent plant: air layering can root a stem while it remains attached, then allow you to separate it after roots form.
For the distinction between leaf and leaf-bud cuttings, see NC State Extension’s propagation handbook. For a tall rubber tree, Iowa State Extension explains air layering.
Frequently Asked Questions
Does a rubber plant cutting need a node?
Yes. To grow a new shoot, include a viable stem node and growing bud. Roots on a detached leaf do not by themselves make a complete new plant.
Is rooting hormone required?
It is optional for many home propagation attempts. If used, follow the product directions; it cannot repair a cutting with no viable bud or decayed tissue.
How long does rubber plant propagation take?
Expect weeks rather than days, with substantial variation by cutting and conditions. Judge progress by healthy tissue and established roots, not a fixed deadline.